- Google Nest Community
- Cameras and Doorbells
- Re: Nest Doorbell Battery and Nest Doorbell Wired
- Subscribe to RSS Feed
- Mark Topic as New
- Mark Topic as Read
- Float this Topic for Current User
- Bookmark
- Subscribe
- Mute
- Printer Friendly Page
Nest Doorbell Battery and Nest Doorbell Wired
- Mark as New
- Bookmark
- Subscribe
- Mute
- Subscribe to RSS Feed
- Permalink
- Report Inappropriate Content
11-30-2022 10:56 AM
I have a Nest Hello wired doorbell susessfully connected to the indoor chime that has F/T/R connections. I have added a rear door Nest Doorbell (battery) and want to also connect it to the same chime. I chatted with support for a long time who referred me to online documents that I have already seen. Was looking for proper wiring diagram. My cutrrent wiring is with the front Door Nest Hello it is using the interface shown below. I would like to add the Nest Battery Doorbell to the setup and have it set off the chime.
Looking for advice.
Thanks
- Mark as New
- Bookmark
- Subscribe
- Mute
- Subscribe to RSS Feed
- Permalink
- Report Inappropriate Content
11-30-2022 11:40 AM
The Google Nest Doorbell (Battery) does NOT use a chime connector or chime puck: "The Nest Doorbell (battery) doesn't need the chime connector for wired or battery-powered installation."
- Mark as New
- Bookmark
- Subscribe
- Mute
- Subscribe to RSS Feed
- Permalink
- Report Inappropriate Content
11-30-2022 12:56 PM
I understand what you are saying, but I already have the chime connector installed for my wired Nest Hello. I wanted to know if anyone had a diagram to add the battery doorbell to the setup I alredy have
- Mark as New
- Bookmark
- Subscribe
- Mute
- Subscribe to RSS Feed
- Permalink
- Report Inappropriate Content
11-30-2022 03:05 PM
I thought I had seen a diagram for this in this forum, but I can't find it. You shouldn't have to make any changes to the wiring you already have for your chime and your Nest Hello; the wiring for the regular doorbell that you are replacing with a battery doorbell would not change because the battery doorbell doesn't use a chime.
In the Help topic below, there's a diagram for the 2nd gen Google Nest Doorbell combined with a regular doorbell; the wiring for the second doorbell doesn't change, and would not if it were replaced with a battery doorbell.
- Mark as New
- Bookmark
- Subscribe
- Mute
- Subscribe to RSS Feed
- Permalink
- Report Inappropriate Content
12-06-2022 08:55 AM
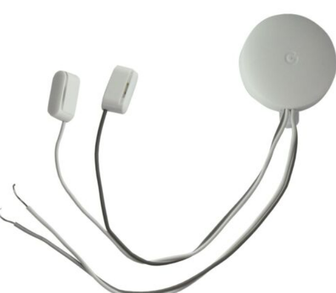
You should not have to change your wiring in order to use the new chime puck. It is made to replace your current chime connector. Thank you for all of your help, @MplsCustomer.
Best regards,
Brad
- Mark as New
- Bookmark
- Subscribe
- Mute
- Subscribe to RSS Feed
- Permalink
- Report Inappropriate Content
12-09-2022 09:08 AM
Hi there,
Just checking in to see how the conversation is going. Please let us know if you have any further questions or concerns. We'll leave this thread open for a little longer for follow-up questions and concerns.
Best regards,
Brad
- Mark as New
- Bookmark
- Subscribe
- Mute
- Subscribe to RSS Feed
- Permalink
- Report Inappropriate Content
12-13-2022 01:22 PM
Hello folks,
@Scott68 just one quick final check in here since activity has slowed down. We'll be locking the thread in the next 24 hours, but if you still need help, I would be happy to keep it open. If there's more we can do, just let me know.
I appreciate your help, Brad and MplsCustomer.
Regards,
Emerson
- Mark as New
- Bookmark
- Subscribe
- Mute
- Subscribe to RSS Feed
- Permalink
- Report Inappropriate Content
12-13-2022 01:30 PM
Please Keep open. I haven't had time to try to fix yet. Thanks
- Mark as New
- Bookmark
- Subscribe
- Mute
- Subscribe to RSS Feed
- Permalink
- Report Inappropriate Content
12-14-2022 01:06 PM
Hey Scott68,
Thanks for getting back to us. I'll keep this thread open but please be advised that as Community Specialists, we occasionally do a bit of housekeeping to keep the conversations in our community fresh and relevant. This includes locking threads after a period of inactivity.
Best,
Emerson
- Mark as New
- Bookmark
- Subscribe
- Mute
- Subscribe to RSS Feed
- Permalink
- Report Inappropriate Content
12-20-2022 10:29 AM
Hello Scott68,
I wanted to follow up and see if you are still in need of any help. Please let me know if you are still having any concerns or questions from here, as I would be happy to take a closer look and assist you further.
Regards,
Emerson
- Mark as New
- Bookmark
- Subscribe
- Mute
- Subscribe to RSS Feed
- Permalink
- Report Inappropriate Content
12-21-2022 10:35 AM
Hi Scott68,
Just one quick final check in here since activity has slowed down. We'll be locking the thread in the next 24 hours, but if you still need help, I would be happy to keep it open. If there's more we can do, just let me know.
Thanks,
Emerson

